The Ensoniq TS12 homepages |
||
|
unscrew the synthesizer keyboard |
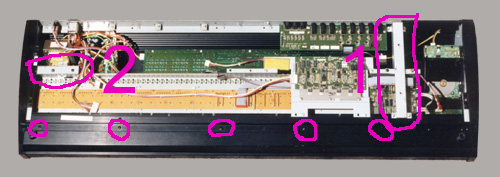
7. Removing the keyboardAttention: take out the floppy an the floppy plastik bracket first. I'm sorry that that photo isn't better. On the photo the Floppy, the floppy plastic bracket, the DA adapter card and the keyboard interface are still in the synthesizer. These parts have to be removerd all. I hope I will get a better photo in the next few weeks.
Bracket (1) is fixed with two self tapping screws in the front aluminium profile, with two screws (4 x 10 mm, metric)
in the keyboard plate, and with two self tapping screws in the back side of the synthesizer. Step eight: |
|